
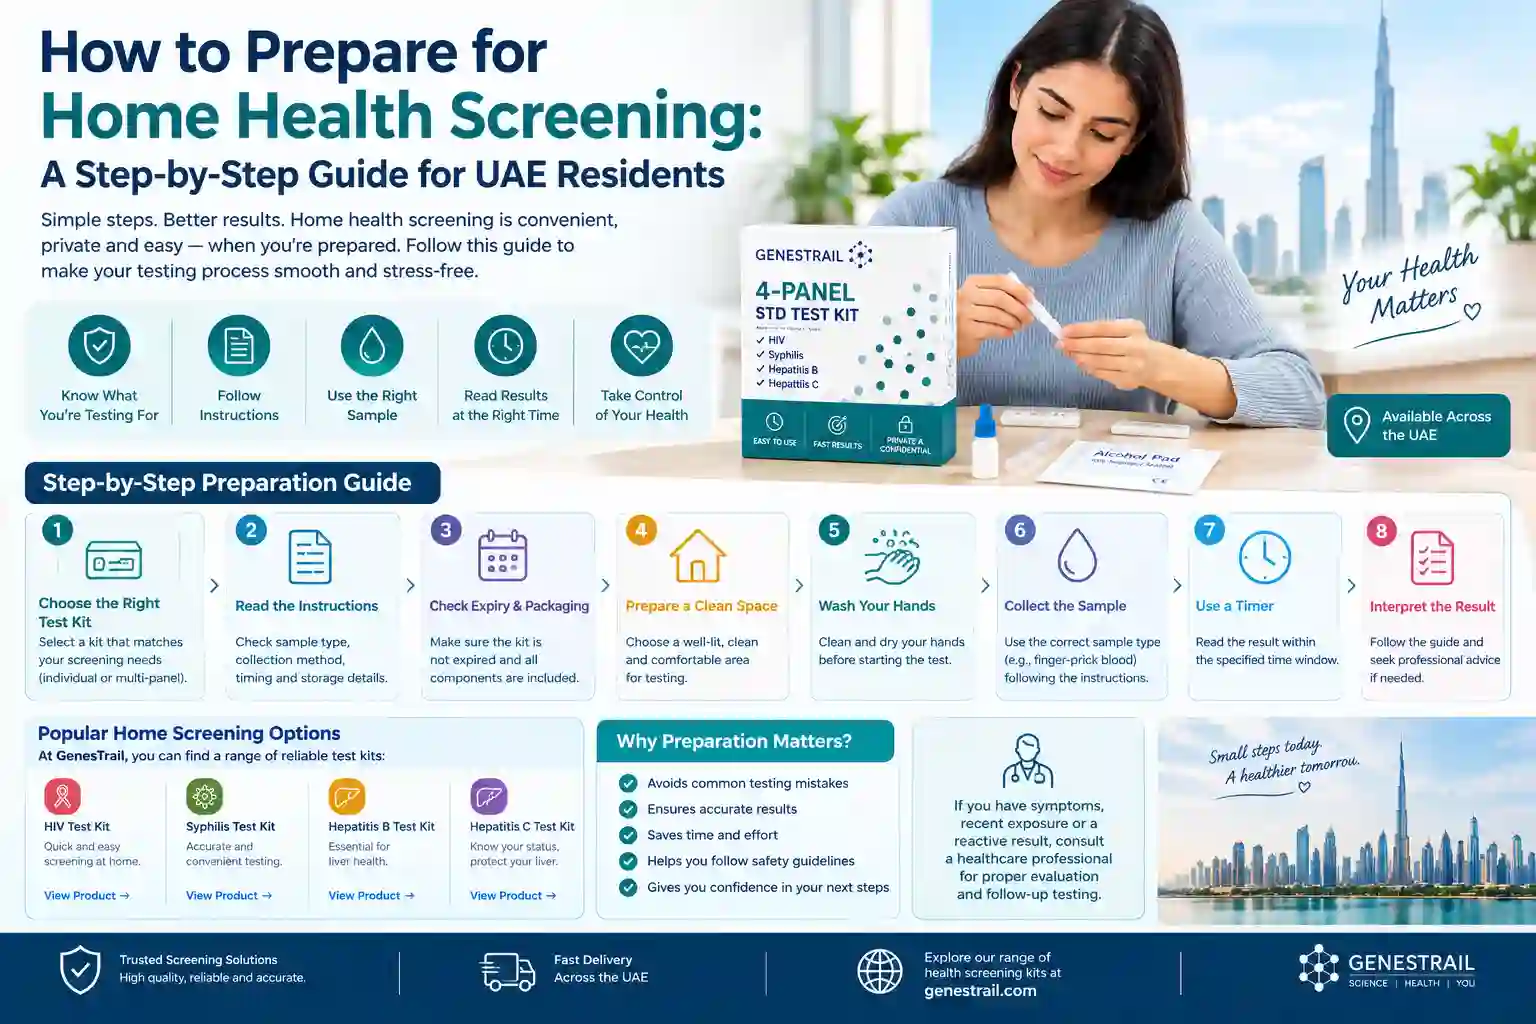
Home health screening has become a convenient option for people in the UAE who want to take a proactive approach to their health. Whether you are considering an individual screening kit or a multi-panel option, proper preparation can make the testing process easier and help you follow the instructions correctly.
A home test is only useful when it is used properly. Before starting, it is important to understand what the kit is designed to detect, check the instructions, prepare the required materials and know how to interpret the result.
This step-by-step guide explains how to prepare for home health screening in the UAE and what to consider before, during and after using a home screening kit.
What Is Home Health Screening?
Home health screening involves using a test designed for use outside a traditional laboratory or clinic setting. Depending on the product, a screening kit may be designed to detect specific health markers using a particular sample type.
Different kits can screen for different targets. For example, some are designed for individual screening, while multi-panel kits can cover several specified markers in one testing format.
The most important first step is to understand exactly what your selected kit is designed to detect.
Step 1: Choose the Right Screening Kit
Before purchasing or using a home health screening kit, identify what you actually want to screen for.
Some common options include:
Individual HIV screening
Syphilis screening
Hepatitis B screening
Hepatitis C screening
Chlamydia screening
Gonorrhea screening
Multi-panel screening
For example, if you are looking for a broader screening option, the GenesTrail 4-Panel Test Kit is designed to screen for four specified targets: HIV, syphilis, hepatitis B and hepatitis C.
Choosing a kit based on its actual screening targets helps prevent confusion later.
Step 2: Read the Product Instructions Before Testing
One of the most important preparation steps is reading the manufacturer's instructions before opening or using the test.
Do not rely solely on general information found online because testing procedures can vary between products.
Check the instructions for:
Required sample type
Sample collection method
Number of drops or amount of sample required
Required testing time
Result-reading window
Storage requirements
Expiration date
Invalid-result instructions
Taking a few minutes to review the instructions beforehand can help you avoid common testing mistakes.
Step 3: Check the Expiration Date and Packaging
Before using your home screening kit, inspect the packaging.
Look for:
Expiration date
Damaged packaging
Missing components
Open or compromised test materials
Storage information
If the packaging appears damaged or the kit has expired, do not assume that the test will provide a reliable result. Follow the manufacturer's guidance regarding replacement or use.
Step 4: Prepare a Clean Testing Area
Choose a clean, stable and well-lit surface before beginning.
A suitable testing area can make it easier to:
Organize the kit components
Collect the required sample
Follow the instructions
Keep track of the testing time
Read the result correctly
Keep unnecessary items away from the testing area so you can concentrate on the procedure.
Step 5: Wash and Dry Your Hands
Before beginning the test, wash your hands and dry them thoroughly if instructed by the product directions.
Clean hands can help maintain good testing hygiene and make handling the kit easier.
If the test requires a finger-prick sample, make sure your hands are prepared according to the manufacturer's instructions before collecting the sample.
Step 6: Check Which Sample the Kit Requires
Not every home screening kit uses the same sample.
Depending on the product, testing may require a specific type of sample, such as a blood sample.
Never substitute one sample type for another unless the manufacturer's instructions specifically allow it.
For example, a blood-based screening kit should be used according to its stated blood-sample collection procedure.
Step 7: Gather Everything You Need
Before starting, make sure all required components are available.
Depending on the test, these may include:
Test cassette or testing device
Sample collection equipment
Buffer or testing solution
Lancet, where applicable
Alcohol pad
Dropper or collection device
Timer
Having everything ready before collecting the sample can make the process smoother.
Step 8: Follow the Sample Collection Instructions Carefully
Sample collection is an important part of home screening.
Follow the manufacturer's instructions exactly. Pay attention to details such as:
Where the sample should be collected
How much sample is required
How the sample should be transferred
Whether a specific collection device must be used
When the sample should be added to the test
Avoid guessing the amount of sample or changing the procedure.
Step 9: Use a Timer
Many screening tests require the result to be read during a specific time window.
Once the test has been activated, use a timer if necessary.
Do not read the result too early or significantly after the manufacturer's specified reading period.
Following the correct timing helps reduce confusion when interpreting the test.
Step 10: Understand the Result Categories
Home screening tests commonly provide categories such as:
Negative or Non-Reactive
This generally means the specific marker the test is designed to detect was not detected.
However, interpretation can depend on the particular test, timing and circumstances.
Positive or Reactive
A reactive result indicates that the test has detected the marker it is designed to identify.
A reactive screening result may require additional testing or professional evaluation. It should not automatically be treated as a final diagnosis.
Invalid
An invalid result generally means the test did not function as intended or the result cannot be interpreted.
Follow the manufacturer's instructions regarding repeat testing or replacement.
Step 11: Understand the Difference Between Screening and Diagnosis
This is an important consideration when preparing for home health screening.
A screening test is intended to identify whether a particular marker is detected. A diagnostic evaluation can involve additional laboratory testing and professional assessment.
For some conditions, a reactive screening result requires follow-up testing before a diagnosis can be established.
Therefore, do not make medical decisions based solely on an unclear or reactive home screening result.
Step 12: Consider the Timing of Your Test
When you test can matter.
Different screening methods have different detection windows. If you are testing because of a recent concern or possible exposure, a healthcare professional can help determine whether testing now or repeating testing later is appropriate.
A negative result should not automatically be interpreted as ruling out every possible situation, particularly when testing is performed very soon after a potential exposure.
Always consider the specific test instructions and relevant medical guidance.
Step 13: Keep Your Test Kit Stored Correctly
Proper storage is important both before and, where applicable, during use.
Check the manufacturer's packaging for information about:
Temperature
Humidity
Sunlight exposure
Packaging requirements
Expiration
Storage after opening
The UAE's warm climate makes it particularly important to follow the storage requirements stated by the manufacturer.
Do not leave a test kit in places where excessive heat or direct sunlight could affect the product.
Step 14: Know What to Do After Testing
Once you have completed the test, follow the instructions for disposal and record the result if appropriate.
If the result is:
Negative: Review the instructions and consider whether the timing of testing is appropriate for your circumstances.
Reactive/Positive: Follow the manufacturer's instructions and seek appropriate professional follow-up where recommended.
Invalid: Follow the instructions regarding repeat testing.
If you have symptoms or ongoing health concerns, do not rely exclusively on a home screening result. Consider speaking with a qualified healthcare professional.
Individual vs. Multi-Panel Home Screening
UAE residents have different screening needs.
An individual test may make sense when you are interested in one specific screening target.
A multi-panel kit may be useful when you want to screen for several specified targets in one testing format.
For example, GenesTrail provides individual screening options such as:
GenesTrail HIV Ab/Ag P24 4th Generation Test Kit
For people looking specifically for syphilis screening, an individual option is also available:
The right choice depends on the screening targets you are looking for and the testing method specified by the manufacturer.
A Simple Home Screening Checklist
Before starting your test, use this quick checklist:
Before Testing
Confirm what the test detects
Read the manufacturer's instructions
Check the expiration date
Inspect the packaging
Confirm all components are included
Check storage requirements
Prepare a clean testing area
Have a timer available if required
During Testing
Wash and dry your hands
Collect the correct sample
Use the specified sample amount
Follow each step in order
Start the timer when instructed
Read the result within the specified time
After Testing
Interpret the result according to the instructions
Do not guess an unclear result
Repeat an invalid test according to instructions
Arrange follow-up when a reactive result requires it
Seek professional advice if you have health concerns
Common Home Screening Mistakes to Avoid
1. Testing Without Reading the Instructions
Even if you have used a similar kit before, different products can have different procedures.
2. Using an Expired Kit
Always check the expiration date before testing.
3. Using the Wrong Sample
Use only the sample type specified by the manufacturer.
4. Guessing the Result
If you are unsure how to interpret the test, review the instructions and seek appropriate professional guidance.
5. Reading the Result Outside the Correct Time Window
The manufacturer's specified reading period should always be followed.
6. Treating Screening as a Final Diagnosis
A screening result may indicate the need for further evaluation rather than provide a definitive diagnosis.
7. Ignoring Storage Requirements
Improper storage can potentially affect test performance. Follow the product's storage instructions carefully.
Why Preparation Matters for UAE Residents
Home health screening is designed to make certain screening processes more convenient, but convenience does not mean preparation can be skipped.
For UAE residents, a well-prepared testing process can help ensure that the kit is handled correctly from opening through result interpretation.
Whether you live in Dubai, Abu Dhabi, Sharjah or another part of the UAE, the basic principle remains the same: know what you are testing for, follow the product instructions carefully and understand what your result does—and does not—mean.
Frequently Asked Questions
Can I prepare for home health screening in advance?
Yes. You can read the instructions, check the expiration date, prepare a clean testing area and make sure all required components are available before beginning.
Do all home screening kits use the same procedure?
No. Sample types, collection methods, testing times and result interpretation can vary between products.
Should I eat or drink before home screening?
Requirements depend on the specific test. Check the manufacturer's instructions rather than assuming that fasting or other preparation is required.
What if my home screening result is reactive?
A reactive screening result may require additional testing or professional evaluation. Follow the manufacturer's instructions and seek appropriate healthcare guidance.
What if my result is invalid?
An invalid result generally cannot be interpreted. Follow the manufacturer's instructions regarding repeat testing.
Can I use a multi-panel kit instead of several individual kits?
A multi-panel kit can be an option when its included screening targets match your needs. Always review exactly what the kit is designed to detect.
Final Thoughts
Preparing properly is one of the simplest ways to make home health screening more straightforward.
Before testing, choose a kit that matches your screening needs, read the instructions carefully, check the packaging and expiration date, prepare your testing area and understand the required sample and timing.
During testing, follow each step exactly as instructed. After testing, interpret the result only within the manufacturer's guidelines and understand when additional professional testing may be appropriate.
For UAE residents looking for convenient screening options, GenesTrail offers both individual and multi-panel test kits that can be considered according to specific screening needs.
Medical disclaimer: This article is provided for general educational purposes and does not replace professional medical advice, diagnosis or treatment. Home screening products differ in their intended use, testing methods and interpretation. Always follow the manufacturer's instructions and seek qualified healthcare advice when appropriate.